Wednesday, 27 January 2016

Editing skills: Glitches and distortion effects

Editing skills: Glitches and distortion effects 

The actual film opening will heavily rely on editing, for example we plan to edit and create our own 'glitch' and distortion effects. From research, we found that there are a number of programs that can help create this look, for instance:

  • Adobe After Effects
  • Final Cut Pro
  • Adobe Premier Pro
We found that these programs have a variety of effects that we think would be suitable for the opening. 

Adobe After Effects - costs money
  • This particular program can only be used with a payment method however,  we were able to access it as I had the program at home. 
  • There are a variety of free effects including glitches, colour changes, distortion and static. 
Final Cut Pro - available at school 
  • Compared to the Adobe After Effects, although it is free as we can use it from the school Macs, we found that there are less effects that are useful to us for our project.
Adobe Premier Pro - costs money
  • Similar to the After Effects program, it costs money but we do have access to it, this particular software also has a range of effects and both the Adobe after effects and premier pro are able to combine together.
  • As both programs can work together, this is easy to create our glitches and effects. 
Learning the editing skills:

From watching numerous YouTube tutorials it is clear that creating our own effects and glitches is not easy. These effects are extremely intricate and time consuming, therefore we have decided to try and get a few starter packs, these were free and available on rampantdesigntools.com. This company offers free effects packs that can be used for any type of project, they also have step by step tutorials which will help us to create our own.


Tutorials


Tuesday, 26 January 2016

Research Survey


From this pie chart you can see I have asked about the protagonist for the film. From my results, it's clear to see that using a young girl would be most effective. This might be because they are stereotyped as being most vulnerable out of the options given. This will help gain sympathy from the audience as they will want her to survive.


As the mask in an essential prop to our horror movie, it had to be just right. Picking the right colour is crucial to making the film effective. I think black was the most popular choice as the dark colour connotes danger, death, eerie atmospheres and the end of things. Perfect for a horror movie!

Titles are one of the first things to grab the audiences attention so I chose this question from the survey as I wanted to find out what the demographic would like. 'The unknown' was the most popular choice so I will use that for the horror movie.

Monday, 25 January 2016

Make up and mask designing

Make up 

For our film opening, we decided to firstly test the types of cuts and bruises that will be used in the killing scene. We brought and used the following products and researched on YouTube tutorials that would help us in this process:

  • Liquid latex
  • Fake blood
  • Face paint
  • Paint
  • Foundation
  • Eye shadow
  • Bronzer
  • Make up brushes
  • Thread/string
The following videos were extremely helpful to us when we were trying out the types of wounds that would look good:


These were some of the few that were extremely helpful as they were easy to understand with the step by step guides. The video below is an example of what our experiments turned out like, there you can see some of the bruising make up and an open wound. The open wound was created by adding a mixture of liquid latex, foundation and tissue in order to create the 'scar' effect. 


Masks
We decided quite early on that we were going to have a masked killer, and for our initial inspiration, we looked at the typical masks that the successful slasher movies had. These included masks from Scream and Texas Chainsaw Massacre, here are some of the masks that we took inspiration and ideas from: 


From research, we found that masks were typically white so we decided that our background colour of the mask would be painted in a thick layer of white acrylic paint. We purchased the base of our mask which was made from hard card and papier mache, this look extremely realistic. 

Our mask:


We did several trials on the masks, including a black version, however we decided that the mask looked extremely amateurish and was not completed to a high enough standard. Therefore we stuck to the white idea and added splashes of red and black. The eyes were covered with thread and painted red also. The colour red is extremely symbolic and is a colour that is always associated with horror movies.


The final product


 This is our final product, we decided to add a 'mouth' like feature which would grab the attention of the audience further. The white contrasts greatly with the dark and sinister red and black colour scheme.


Monday, 18 January 2016

Costume and props

Costume and props


Props

  • Mask
  • Laptop
  • Phone 
  • Books
  • Make up 
  • Magazines in background
  • Knife 
  • Pillows
  • Teddy bears
  • Candles
  • Photo frames


Costume
Girl - jumper, girly colours preferably pink, with hair down, black jeans, slippers (as the character is at home, they need to relax)

Boy- jumper, jeans, trainers


Villan - black jeans, plain and simple t-shirt, dark coloured hoodie


Villain 

  • As a technological horror film we would like to keep common conventions of dark coloured clothing but we think by clothing the killer in more recognisable clothing for the modern theme  of technology.
  • The mask the villain is wearing says ignotus which is Latin for unknown, we chose this as the whole essence of a mask is to cover someones faces and conceal identity. 
  • The more recognisable clothes of the killer helps add to the mise en scene of technological the Killer is using it very well

Inital ideas: rough storyboard

Inital ideas: rough storyboard

For our film opening, we have created a rough story board that we can follow. The story board includes the camera shots and angles that will be used.


  • Most of our film opening would rely on intricate editing skills, for example the use of a glitch that allows the face of the killer to appear.
  • The shots that will be used include the over the shoulder shot' close ups, high angles, extreme low angles, tracking shot, shot reverse shot
  • We have looked at a series of possible title names which include the Latin translation of the word 'the unknown' 
  • The addition of annotations mean that we are able to get an idea of the possible shots and the story line of the film opening 


Friday, 8 January 2016

Title Research

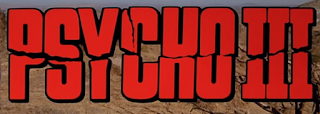
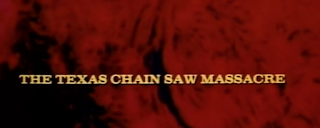
After researching different horror movie titles, there is a clear convention throughout all the ones i looked at. Conventions that in saw was the consistency in colours used. The main colours for the title appearance in the openings was the colours red and black probably because these colours connotes death and danger. It foreshadows bad events to come which is usually the case in horror movies. 


Movie titles can make or break the film. The title is the first thing people are going to experience about the movie. People are not going to watch some movies unless they like the title. Movie titles are the marketing tools and they should help you market your projects.
Some horror movies use direct titles because they are straight forward. They tell you about what you are going to see..
  • Jaws
  • Human Centipede 
  • Psycho

These are just a few things to consider when making our movie title. Audiences look for certain things when thinking about a film. Our title should...

  • GRAB THEIR ATTENTION
  • HINT AT PREMISE
  • IMPLY GENRE
  • IMPLY CONFLICT
  • MEMORABLE